How to Plan a Community Oral History Project, Step by Step
A community oral history project needs a clear focus, trained interviewers, signed release forms and an archive chosen early; here is how to plan one.
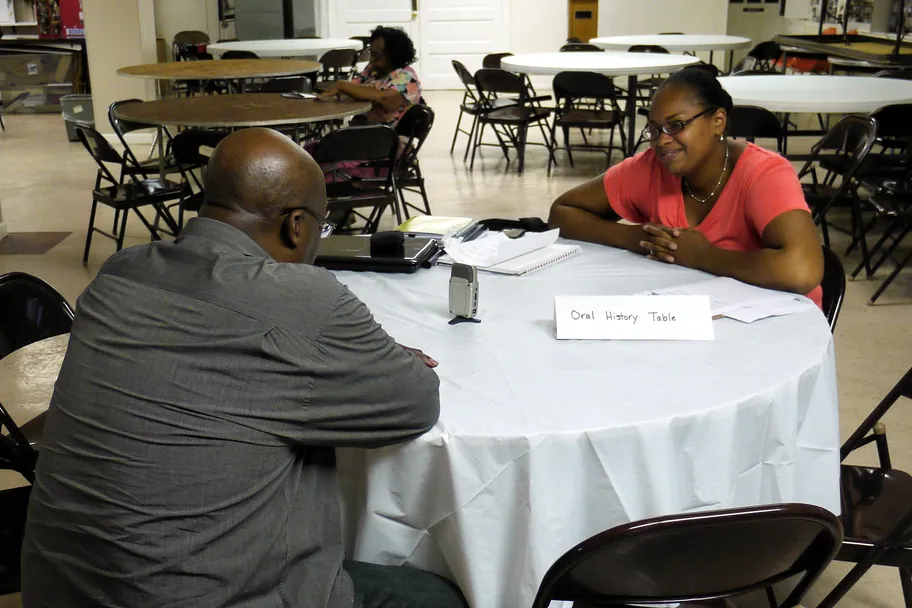
A community oral history project starts with a focused question, a written plan and an archive chosen before the first interview. The Oral History Association (OHA) names four key elements of the work, preparation, interviewing, preservation and access, and advises giving each one careful thought at the start of any project, whether it involves one interview or many.
This guide follows the planning steps recommended by the OHA and the National Park Service (NPS), then covers how to conduct an oral history interview, which oral history interview questions work, what belongs in an oral history release form, and what happens after the recorder stops. It is written for congregations, block clubs, schools, alumni groups and nonprofits in Cleveland, across Cuyahoga County and beyond.
What does a community oral history project need before the first interview?
It needs a plan. The NPS makes the point by quoting the historian Valerie Raleigh Yow: “We cannot skip careful preparation and achieve anything but random conversations.” The ten steps below follow the NPS project design sequence and the OHA’s best practices.
- Focus the topic and do the background research. Decide what you want to learn and why interviews are the right way to learn it. The NPS suggests reading the written sources first, checking whether other archives already hold similar interviews, and asking potential narrators what they think the project should explore.
- Write a mission statement and set the scope. The NPS recommends a short statement naming the project’s purpose and goals, the kinds of narrators, where the interviews will be archived and how they will be used. Budget the time with care: by one estimate the NPS cites, a single interview takes 30 to 60 hours from background research through transcript review and archival deposit.
- Choose a repository early. The NPS advises selecting a repository at the outset and consulting its archivist about requirements. The OHA’s archiving guidance adds that partners should agree from the start on format, rights, preservation, metadata, access and restrictions, and may record those decisions in a memorandum of understanding.
- Build the team and involve the community. The NPS lists the roles most projects need: researchers, project managers, interviewers and record keepers. The OHA suggests that community projects consider a formal plan for engagement, which might include a community advisory board, public events that share what the project learns, and oral history training for residents.
- Train the interviewers. The OHA advises first-time interviewers to seek training, and the NPS treats training as an ethical responsibility, because the relationship between interviewer and narrator can be complex. Schedule a practice session so every interviewer has handled the equipment before meeting a narrator.
- Choose narrators with care. The OHA recommends selecting narrators for the relevance of their experience while including as many diverse voices as possible. Start with a conversation that explains the project and secures informed consent, then hold a pre-interview to learn what each narrator wants to talk about.
- Prepare the consent process and release form. Draft both before you recruit anyone, and use the repository’s form if it has one. The next section explains what they should cover.
- Choose equipment and practice with it. The NPS calls 24-bit, 96 kHz, stereo WAV recording the archival standard for audio and notes that compressed formats such as MP3 are less stable. It recommends an external microphone, usually a condenser model on a small tripod, or a lavalier clipped to the clothing of a soft-spoken narrator.
- Set a time frame. Decide whether the project must meet a deadline, such as an anniversary, or can continue over time. Leave room for transcription and narrator review, which the NPS treats as part of every interview’s life cycle.
- Plan how people will use the interviews. The NPS lists museum exhibits, podcasts and audiovisual displays among the possible uses, and those uses affect choices about equipment and permissions. The National Council on Public History gives the example of a local nonprofit whose community oral history project supplies the research for a historic walking tour.
What goes in an oral history release form?
An oral history release form is the document that allows an archive to keep and share an interview. The NPS explains that interviews are original creative works covered by U.S. copyright law, and that its release assigns copyright to the repository so the archive can share and use the interview in the ways the form describes. Signing does not mean the narrator gives up the use of their own story.
Because an interview is created jointly, the NPS has interviewers sign releases too, and when contractors conduct the interviews, the contract should spell out the transfer of rights. Interviews without a signed release are known as orphan works, a problem the NPS calls epidemic among cultural heritage institutions. Fixing it years later means tracking down narrators or their next of kin.
Consent is broader than a signature. The NPS lists what narrators should understand from the first contact: why they were chosen, who sponsors the project, where the interview will be archived, how it might be used and who will have access. The OHA adds that narrators may decline to discuss certain subjects, restrict access to the interview or, in some circumstances, use a pseudonym, and that interviewers should explain those options during the pre-interview.
The OHA’s core principles say narrators must grant explicit permission before an interview is made public. Its best practices recommend securing the signed release ideally when the interview is completed, following the repository’s policy.
How do you conduct an oral history interview?
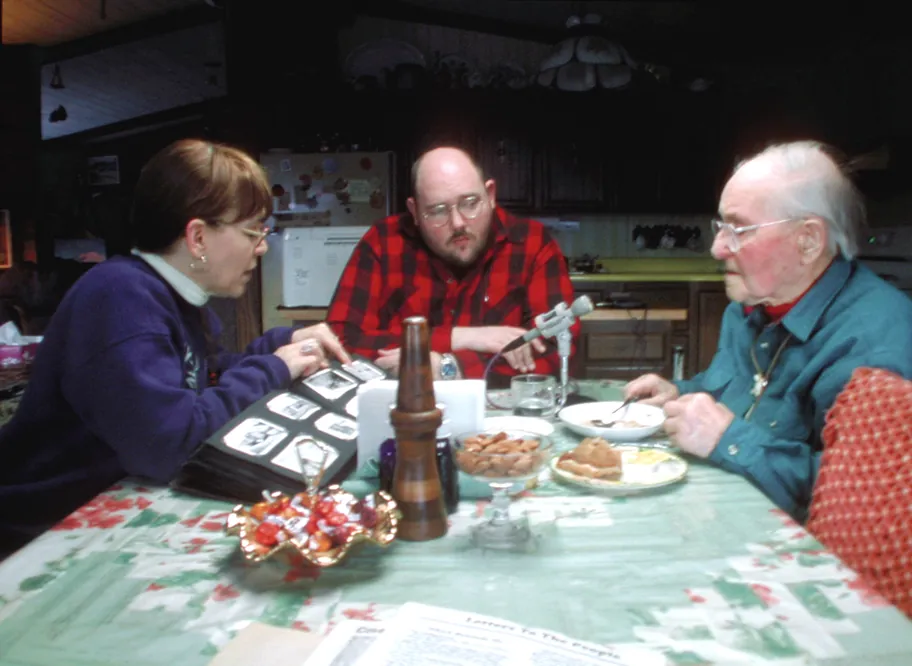
Record in a quiet place with few distractions, as the OHA recommends, and agree in advance on the approximate length of the session. Open each recording with a short spoken lead-in giving the names of the narrator and interviewer, the full date, the location and the subject. The OHA advises naming the location generically, such as “narrator’s home,” rather than giving a street address.
Work from an open-ended guide, an outline of themes and general questions, rather than a rigid script. The OHA asks interviewers to listen actively, ask follow-up questions that invite clarification and reflection, and be prepared to go beyond the project’s focus when the narrator leads somewhere unexpected.
Before the narrator arrives, test the recorder and microphone in the actual room. The NPS warns that a refrigerator, an air conditioner or a ticking clock can intrude on a recording, and it recommends packing batteries and an extension cord in case of a power problem.
Which oral history interview questions work best?
The best oral history interview questions are open-ended. They begin with “how,” “what,” “why” or “tell me about,” and they cannot be answered with a yes or a no. The NPS scope of work guidance suggests asking narrators which topics they consider important and being ready to pursue new topics as they arise.
For a neighborhood or congregation project, questions like these give narrators room to tell their own story:
- How did your family come to this neighborhood?
- What did your street look like when you were growing up?
- Where did people gather, and what happened there?
- Who did people turn to when something needed to change?
- What do you wish people outside the community understood about it?
- What should the next generation know?
For family sessions, our list of questions to ask your grandparents offers more prompts grouped by theme.
What happens after the interviews are recorded?
Preservation starts the same day. The OHA advises transferring the original recording from the device as soon as possible, making redundant copies stored in different physical locations, and choosing cross-platform, nonproprietary formats on the assumption that every format will eventually become obsolete. Keep each interview’s photographs, forms and notes together in a matching file.
Next comes the written record. The NPS estimates that transcribing one hour of interview takes six to eight hours on average, and it calls transcribing skilled labor that requires training. Many projects adopt a style guide and decide ahead of time between a verbatim transcript and a lightly edited one.
When time or money is short, the NPS suggests a timed index or a short abstract instead, and it says any transcript produced by voice recognition software must be checked against the recording. Send each narrator the transcript to review and correct; the NPS scope of work guidance encourages that review within 30 days. Do not post a transcript online until the narrator has reviewed it and the release is signed.
Then give narrators copies of their recording and transcript, which the NPS describes as a way to honor the time and expertise they shared. Deliver everything to the repository with descriptive metadata. The OHA’s archiving guidance asks projects to define the required metadata at the outset and collect it throughout each interview’s life cycle.
What does a finished community project look like?
The East Cleveland Oral History Project is one Cuyahoga County example. Its 25 transcribed interviews, most of them recorded in 2025, were conducted under the direction of Dr. Nicholas S. Mays of Baldwin Wallace University, in partnership with the Cuyahoga Land Bank, and they are archived at Cleveland Voices, the online collection of the Cleveland State University Center for Public History + Digital Humanities.
Each interview has its own public page with the recording, a summary and a full transcript. The collection describes themes including education, migration, community development, faith, entrepreneurship and neighborhood revitalization. That is the end point the planning steps aim for: interviews that anyone can find, hear and read.
Why plan a community oral history project now?
Every congregation, school and neighborhood in Cleveland holds memories that exist nowhere in writing, and the people who carry them will not always be here to share them. A modest project with a clear plan, signed releases and an archive partner can keep those voices for future generations. Our introduction to what oral history is explains why historians value them, and our guide on when to hire a historical consultant can help you decide how much outside help you need.
Mays HisToracle Consulting designs and carries out community oral history projects, from the first mission statement to the archive.
Questions people ask
What should an oral history release form include?
It should identify the narrator, the interviewer and the project, say where the interview will be kept, and state which rights are transferred and to whom. The National Park Service release, for example, assigns copyright to the repository so it can share the interview. Leave room for any restrictions the narrator requests, have the interviewer sign as well, and give the narrator a copy.
How many interviews does a community oral history project need?
There is no minimum. A project can begin with a handful of narrators and grow. Base the number on your mission statement and your capacity, since the National Park Service cites one estimate that each interview takes 30 to 60 hours from background research to archival deposit. One sample NPS mission statement set a goal of 50 interviews; the East Cleveland Oral History Project archived 25.
Do we need an archive before we start recording?
Ideally, yes. The Oral History Association and the National Park Service both advise choosing a repository at the start, because its requirements shape the release form, the recording format and the metadata you collect. The OHA recommends a library or archive able to provide long-term, professionally managed preservation and access. Until one is in place, keep redundant copies in open formats and document everything.
Should we record audio or video?
Audio is simpler and less intrusive, and it suits many community projects. Video shows faces and settings, but the National Park Service notes that it costs more, takes longer to set up, often needs lighting and requires more technical skill. Ask narrators what they prefer, since some feel less comfortable on camera, and choose a format your repository can preserve over the long term.
Sources
- OHA Best Practices, Oral History Association.
- OHA Core Principles, Oral History Association.
- Archiving Oral History: Principles and Best Practices Overview, Oral History Association.
- Oral History Resources: Designing a Project, National Park Service.
- Oral History Resources: Considering Legal and Ethical Issues, National Park Service.
- Oral History Resources: Choosing Recording Equipment, National Park Service.
- Oral History Resources: Interview Transcribing, National Park Service.
- Case Study: Writing a Scope of Work for an Oral History Project, National Park Service.
- About the Field, National Council on Public History.
- East Cleveland (25 transcribed interviews), Cleveland Voices, CSU Center for Public History + Digital Humanities.